Showing posts with label Review. Show all posts

Tuesday, 23 September 2014

Smashbox Photo Finish Foundation Primer SPF 20 with Dermaxyl™ Complex


I received this from Beauty Bulletin in July as part of my second Product Review Club and few things could make me happier.

The Superficial

First impression: you need more than a pea-size for your whole face. Or maybe I just have a big face?

Turns out, a pea-sized amount (not mini-Astro-sized) is really ALL you need per application. But DON'T expect state-of-the-art SPF 20 sun-protection from that amount of product. Y'all know I'm the Sunscreen Drill Sergeant (SDS sounds like a disease), so do I really need to complete this sentence differently? Do I? DO I?

I used this every day for just over a week when I first received it, and (most importantly to me) I had no negative reactions. Two months down the line, still no negative reaction. I only whip it out for special occasions, though. Having a "semi-sensitive, reactive skin type" this is always my first concern.

This primer appears translucent and peachy, and I got excited that it may have a brightening effect (however slight), but it applies diaphanously. Smashbox Photo Finish Foundation Primer SPF 20 with Dermaxyl™ Complex is a semi-matte primer. It gives a very "soft" finish and is not mattifying to the point of looking dry, but not "glowy" enough to be considered "radiant". It is hydrating, but if you're specifically looking for hydration, perhaps you should try something else. Since Smashbox have a primer for everything (except your walls), you could try their Photo Finish Hydrating Foundation Primer, or you could address your hydration needs with skin care products.

I've used this on it's own and with makeup; there isn't a noticeable difference in the appearance of my skin (in the mirror) after application, but photos say otherwise - pores and fine lines are vaguely blurred and softened. When applying makeup, I only needed about half the amount of BB cream I usually apply, for more or less the same coverage. My makeup definitely lasted longer with less touch-ups needed. It is gentle and effective around the eye area as well as on lips. I applied this before MAC Brave Red lipstick, with no other lip product, and I got at least an hour extra out of it. I'll admit to eating a bit more carefully, but that's not unusual of me - I do it whenever I wear red lipstick. You know, that all-teeth eating style? Where it looks like you're avoiding touching the fork with any part of your mouth, due to the possibility of electrocution... Because forks are evil. Common knowledge, this.

I'm enjoying this product and have added it to my every day "essentials" makeup bag, where it'll happily stay. I look forward to trying the Smashbox Photo Finish More Than Primer Blemish Control Primer - it contains salicylic acid which is one of my favourite ingredient superstars and extremely beneficial for all skin types. Avoid if you're allergic to aspirin, though.

The Deep

WTF is Dermaxyl™ Complex?

**Dermaxyl™ Complex is an anti-aging complex formulated to repair damage related to skin aging. This makes sense since it's a blend of amino acids which help normalize skin cell function by stimulating cell-communication. It may repair skin damage related to aging by stimulation of collagen and hyaluronic acid production. This will also contribute to the strengthening of the skin's natural barrier function. Clinicare.com says, "Daily use of products formulated with Dermaxyl produce results similar to retinoic acid and retinol, and, very importantly, does so without the irritation these products and alpha hydroxy (fruit/glycolic) acid-based formulations often cause." You can read more about the clinical study results here.

Ingredients (as it appears on packaging):
Cyclopentasiloxane,
Homosalate
Polysilicone- 11
Dimethicone Crosspolymer
Ethylhexyl Salicylate
C12-15 Alkyl Benzoate
Butyl Methoxydibenzoylmethane
Tocopherol Acetate
Cola Acuminata (Kola) Seed Extract
Vitis Vinifera (Grape) Seed Extract
Carthamus Tinctorius (Safflower) Seed Oil
Polyglycerol-4 Isostearate
Cetyl PEG/PPG- 10/1 Dimethicone
Octyldodecyl Neopentanoate
Tribehenin
Ceramide 2
PEG-10 Rapeseed Sterol
Palmitoyl Oligopeptide**
Acetyl Hexapeptide-8
Phenyl Trimethicone
Water\Aqua\Eau
Silica
Laureth-12
Hexyl Laurate
VP/Hexadecene Copolymer
Triethoxycaprylylsilane
Caprylyl Glycol
Hexylene Glycol
Hydrogenated Polydecene
Phenoxyethanol
Potassium Sorbate
Iron Oxides (CI 77491)

You can also check out my video review for Beauty Bulletin, if you so wish:


Miss B

*prices are correct according to www.redsquare.co.za at the time of publishing

Monday, 7 July 2014

Clinique Anti-Blemish Solutions Clinical Clearing Gel

source

I received this product from Beauty Bulletin about 3 weeks ago and was super excited to be selected as part of the Clinique Anti-Blemish Solutions Clinical Clearing Gel Review Club. First time as a part of a BB Review Club. I've used Clinique skin care products before, and although there are very few that I like (The City Block Sheer Oil-Free Daily Face Protector SPF 25 can stay!), I'd totally spend a little extra on their makeup.

The texture is nice - light and easily absorbed, and the packaging is simple and "clean", but not ideal for preservation of the product. The bottle is a firm/hard plastic and unless you can squeeze some out and close it while holding that squeeze without letting more product out, air will get in, and render the product less effective over time. Common problem, that. 

I'm not sure if I'm more disappointed in this product or myself. When I got the news that I'd be receiving it, I Googled my ass off in search of ingredients. Think page 5 of Google search results...where English seemed scarce. No luck, so I had to wait until I had it in my hands. I was very excited about the inclusion of salicylic acid and a few other beneficial ingredients, but this is overshadowed by the use of alcohol and witch hazel which are known skin irritants. Alcohol makes up most of this product and it is very apparent upon opening the product. My heart sank when I saw that alcohol was the first ingredient. Sigh. But neither that nor the addition of witch hazel stopped me from putting it on my face. And I totally regret it.

These pics are not edited in any way, and I clearly haven't mastered all this selfie bs.

I had a mild breakout with one very noticeable blemish below my nose when I started using this. Although the most noticeable blemish was somewhat diminished the next day, I had more noticeable blemishes than before I started using the Clinique Anti-Blemish Solutions Clinical Clearing Gel, including that little monster on my cheek (top right pic). After using this on my entire face, twice a day, for 2 days with much discomfort, I tried using it as a spot treatment for the next 5 days, with no improvement. Using this product had senstitized my skin and I had to deal with breakouts, redness and flakiness. I stopped using the Clinique Anti-Blemish Solutions Clinical Clearing Gel after 7 days of use, and 5 days after that my skin was almost clear, except for that little bugger (top right on image). The mark is still visible, but I haven't been able to feel it since about 4 days after ceasing to use the Anti-Blemish gel.

Needless to say, I won't be recommending this product. I've had more success with Tea Tree oil. The Clinique Anti-Blemish Solutions Clinical Clearing Gel retails at R230 for 15ml, and R350 for 30ml.*


Ingredients (as it appears on packaging):
Alcohol Denat.
Water\Aqua\Eau
Acrylates/C10-30 Alkyl Acrylate Crosspolymer
Hamamelis Virginiana (Witch Hazel)
Salicylic Acid
Laminaria Saccharina Extract
Sea Whip Extract
Butylene Glycol
Benzalkonium Chloride

Miss B


Follow on Bloglovin

*prices are correct according to clinique.co.za at the time of publishing

Wednesday, 8 January 2014

Bourjois Rose Exclusif Lipgloss

Bourjois Rose Exclusif Lipgloss, R99,95 on rubybox
This. Is. My. FAVOURITE! Lip product at the moment. Lip balm is the only other thing I've been wearing on my lips since receiving this from rubybox in November, along with the Bourjois Smoky Eyes Trio in Rose Vintage and the Bourjois Khol & Contour Eyepencil in Brun Design. It's just right. Every time.

Self-adjusting products are popular, and it's totally understandable why; with different undertones, complexions, "correction" requirements and the need for minimal guesswork when purchasing makeup. While walking around in a department store one day, running out of testing space on my arms (I'm sure you're familiar with this) looking for the perfect shade of blush, I came across a self-adjusting gel formula and was blown away, as I didn't expect to find it in SA, at the time. We have access to many SUPER brands (not enough, though) but we don't often get the WHOLE collection of products. Within the next month or two, there were self-adjusting products errrwhere. I like the idea, but very few of them work to my satisfaction. I've tried a few on my hands and arms in stores that just didn't adjust to suit MY skin colour or a natural-looking shade of pink. I'm still like a kid about it, though, I get all excited when clear gels and white creams start turning into shades of a good cup of tea with milk, or into strawberry Fizzer shades. Omg, you guys, I have a serious Fizzer addiction. I'm totally going off sugar once I finish this bag of Fizzers, I swear. My body has spoken! But it tastes SO GOOD!

Jeez, can you, like, get back to the product at hand, here, Crazy.

2 3 4 7 Fizzers later.

Bourjois Rose Exclusif Lipgloss contains pigments that adjust to the pH of your lips, delivering a somewhat exclusive rose-pink shade. We could all use this and have different shades of rose-pink lips. I tried it on my cheeks, too, thinking it would be all matchy-matchy with my lips. It wasn't. Clearly differing pH levels, then.

Bourjois Rose Exclusif Lipgloss. Love the brush. It's like a nail polish brush. I want nail polish with a brush like that. 

It goes on as a clear, slightly sticky gloss, that is also self-leveling, I may add. The colour develops within seconds... and sometimes keeps developing. It doesn't say that the colour intensity is layer-dependent, but I've noticed that the more I apply, the darker/brighter it seems. I don't mind dark/bright pinks, but if you're looking for a natural, hint of pink, you either need to use very little and spread it with a clean lip brush or your finger tips, or you need to move on to something else.

I thought I could outsmart this product by "lining" my lips with it a few minutes before filling in it to create a two-tone effect. It looked like those really old-school sitcoms and music videos where they lined their lips and then added clear gloss. Just no.  Minutes later, I applied it again, going over the entire area of my lips. It was SO COOL. Two-toned lips with minimal thought or effort. Until minutes later, it all developed into a uniform colour. Short-lived genius. I guess you could also look at that as foolproof. Right?

It has vitamins C and E, which I love, but it certainly doesn't provide 8 hour moisture as it says it does. It's not a drying gloss at all, as I've come to expect of sticky glosses, but I didn't find it particularly moisturizing. Also, the glossiness will wear off, especially if you're going to eat, drink, talk a lot or kiss someone. The colour, however, outlives the gloss. So even hours after your pout is no longer bouncing the light into the eyes of a cute person, it will still look like you just ate a  pink bompie. still look nicely tinted/stained, and more natural. Two thumbs up for colour longevity.

I've only tried this over a lipstick once, and I didn't particularly love the result, so I'll keep using this clean, or over lip balm. You really don't need anything else with this lip product, and I'll be more than happy to purchase this with my own paper cash money once I finish this one. It's now a staple. Also, pretty convenient if you're going out and want to use a clutch or a small bag with minimal space. You know, the ones that can only carry your phone, money and a couple of tissues. Just halve the amount of tissues, and add your Bourjois Rose Exclusif. :-D


Miss B


Follow on Bloglovin

Thursday, 19 December 2013

Bourjois Khol and Contour Pencil in Brun Design

Bourjois Khol & Contour Eyepencil in 78 Brun Design, R85,95* on rubybox.co.za 

I was cleaning out my makeup bags the other day, and didn't realize I had so many.  I hardly use black eye pencil, but I have four (????), of which I use one.  Maybe they've been procreating?

I digress.

I received the Bourjois Khol & Contour Eyepencil in Brun Design with the Smokey Eyes Trio last month, and I'm slightly infatuated with it. It's super soft and rich in pigment. It's a beautiful, dark, matte brown, like the colour of Lindt 70% Cocoa chocolate. Yum. I would've loved to take a picture of the eyepencil and chocolate side-by-side, but... chocolate. Yum.

You could use this sharpened to get the perfect barely-there line on your upper eyelids with little effort. It's also GREAT for tight-lining, and because it's so soft, minimal manipulation of the eyelid is required. No pulling, stretching, lifting. If you prefer a thicker, more obvious khol line, you could use it blunt or simply slant the pencil like you would for "shading" in a colouring book. Keep in mind that this pencil is super soft and you need minimal pressure during application. I learnt this by bending and breaking the nib a couple of times.

The Bourjois Khol & Contour Eyepencil in Brun Design is also SUPER for contouring and smudging. I could create a perfectly acceptable and presentable smoky eye using just this pencil. Srsly. Wanna contour your lids? Simply dot/dab the pencil in the crease of your upper eyelid and smudge'n'blend with your ring finger or a blending brush. Even those little sponge applicators you usually get with compacts can be used for this. For an intense smokey eye, you could line your entire lid with this and simply smudge'n'blend the obvious lines and voila. If you're going to smudge and blend with ease, you have to do it soon after application, though, or you'll need to use a little more effort for it to budge, and probably some beauty tools, too. This makes it great for flicks and winged-liner, especially if you're not comfortable and confident with liquid and gel liners. Which brings me to it's "hold"...

It is long-lasting, and won't run and smudge unless seriously provoked. This isn't an eyepencil that will move in the slightest if you splash your face with water. You can't just wipe this away without makeup-remover or cleanser. Is it hard to remove? No. But water is not going to cut it. I had created flicks with this pencil last week and forgot to remove my eye makeup before jumping into the shower (and I avoid "washing" my eyes, as my current cleanser is not ideal for the eye area) and my eye makeup was still fully intact. Not even the slightest smudge or fading, and I had rinsed my face a couple of times to remove my cleanser properly AND I had dried my (whole) face. Impressive staying power, right? Whether or not it lasts 16 hours, I wouldn't be able to tell you, as I've never worn makeup for that long. But, on their website they state that it was "scientifically tested on 22 consumers - result obtained on 32% of panelists", so if you need your eye pencil to last for that long, I hope you're in the 32%. I love that they disclosed that. And I love scientific tests. A lot.

To add to it's multi-purpose appeal, this is also a great eyebrow pencil. I have naturally dark brows, but sometimes I need to fill a few gaps, especially when I'm going through a "reinvention" phase where I decide to change the shape of my eyebrows, or change the position of the arch. If you've read about my hair issues, you'll know that this is the only way I'll attempt changing my look. For now.

I'm tempted to contour my whole face with this pencil, because it's so nice. The only thing holding me back is that it's way darker than a "couple of shades" and I may look dirty, but I'll be totally on it should I have no other contouring products handy, if and when needed. Also, watching my eye pencils get smaller as I sharpen them makes me sad. 

Have you tried any of the Bourjois Khol & Contour Eyepencils? Which colours are your favourite?


Miss B

*At time of publishing


Follow on Bloglovin

Wednesday, 18 December 2013

Bourjois Smoky Eyes Trio in Rose Vintage

I was fortunate to receive the Bourjois Smoky Eyes Trio in Rose Vintage 05 from rubybox for my last task as a RUBYROYAL, where I demonstrated one of the ways in which you can take your look from day to night.

Bourjois Smoky Eyes Trio in 05 Rose Vintage*

The Bourjois Smoky Eyes Trio uses "baked technology", is enriched with mineral powders, and is fragrance free. It's cutely packaged in a "compact case" that includes a double-tipped applicator. I've dropped the compact onto tiled floors at least twice in the past month and it has only 1 scratch on it and the shadows haven't broken or cracked, which is pretty impressive. Had I dropped my professional palette (again), I would've mourned the death of at least one (more) shade.

My first impression was that it would make a great blush. At least, that was my intention for the medium shade as it looked like the perfect shimmery pink for my complexion (I've noticed that I tend to think this about many products colour-coded as "rose"), but after trying it I've decided that it is much better as a cheek highlighter, as shown in this video. I don't usually stray far from neutrals when it comes to eye shadow, so I was a bit hesitant when trying this out. 

It says "silky, easy-to-blend texture, 8-hour wear" and I find this to be accurate. Mostly. It's super silky and soft and easy to blend, but I found the lightest shade to be "harder" than the others: it didn't pick up onto my brush as easily as the other 2 shades, and I had to do that horrible swiping motion with my brush to get the pigment onto the brush. You know, like some impatient cashiers do with your Smart Shopper/Vitality/Clicks card? Or like you did when you were about 6 years old, playing shop-shop with your plastic till? I'm all for product economy, and all that friction created "dust" and I had to wipe away most of it. I find that a finger works slightly better.

Left: no flash. Right: flash. Yes, I'll get better at taking pics with one hand.

The lightest shade looks like a pale rose mist-/seashell-/lavender blush-/antique white-meets-pearl or, more simply, a shimmery champagne pink. Although, it didn't pick up easily with the brush, it was soft and easy to blend once on the skin. You can also use this shade not only as a highlighter on your brow bone and inner corners of your eye, but also on the bridge of your nose and cupid's bow. Use it sparingly, though, as it is very shimmery. Great glam for night, but I'd spend more time blending for day wear.

The medium shade is my favourite. It's a light piggy-pink shade. It's great over the entire lid as an everyday application. It's my lazy-girl shade at the moment, meaning if I have to leave the house, I swipe it on, apply mascara and that's my eyes done. Nothing else needed, as it's so pretty and brightening enough on it's own. As mentioned above, it works nicely as a cheek highlighter. It may be slightly too pink (and shimmery) to use as a highlighter anywhere else on your face. Depending on your complexion, you could use this as a shimmer blush, or as a shimmery veil over your matte blush. Remember to start off with a light-hand and blend well. It's easier to layer to get the desired effect, than to try to correct too much shimmer at a later stage. This shade is also great to dab over a lifeless matte, pink lipstick/tint/gloss, and you could do this over the entire lip or just at the centre for some dimension.

"Plummy" was the first thought I had when testing the darkest/sculpt shade. Actually, it's the colour of dried-red-roses before they turn brown and crumble. Duh, "Rose Vintage". It's intense. You won't need to dampen your brush to intensify this shade, simply pat it on and BOOM! It doesn't become much darker the more you layer it. It's pigment-rich and what you see is what you get. I did a single application (one layer) in the swatch above. What DOES happen when you layer it, though, is that the lighter accents of the shade become more apparent, giving it a more pinky, pearlized effect.

The Bourjois Smoky Eyes Trio in 05 Rose Vintage can be versatile in terms of function and the colours are great for any eye and complexion colour. Although I was a little concerned at first about the "pinks", it complements my brown eyes, and I've worn even the darkest shade more than I thought I would. I don't often expect eyeshadows to last for 8 hours, even if it clearly states that it will, but this one did. In fact, it lasted just over 10 hours. I applied it in the morning, cleaned the house**, walked the dogs on the beach**, made dinner and then showered, and it was still intact before I showered. I had rubbed my eye once that day, forgetting I had applied a full face makeup, and it smudged a little, but didn't come off completely. I hadn't used a primer or applied powder that day, I simply applied it over my tinted moisturizer, which seemed to be enough. There was slight creasing, though, but not enough to make me want to remove it or reapply it. Nothing a primer or some powder pre-application couldn't fix, in my opinion. 

I've put the Bourjois Smoky Eyes Trio 05 Rose Vintage in my personal makeup collection, and there it will stay. Not only because of all the above reasons, but also because the man had noticed it and said I looked pretty and asked if I was going out when I applied it that morning before cleaning (even though I was wearing trackpants and an over-sized t-shirt). That coming from a guy who asks, "Did you wash your hair?" or says, "your hair looks nice" when he thinks something's different but can't figure out what...like when I tweeze my eyebrows or paint my nails. Really.


Miss B

*prices vary depending on where you purchase it. I've checked a few online stores, but the price varies by as much as R70.
**This is how I test the "longevity" of makeup: I apply it in the morning after cleaning my face, I clean the house (properly, not just pack dishes away) and then walk the dogs. Sometimes I'll throw a workout into the mix, but this rarely happens.


Follow on Bloglovin

Monday, 7 October 2013

My Hair Issues and an Updo Tutorial

I have long hair and hardly do anything more than wear it down, in a ponytail or in a bun (often a messy one). I'm also that kind of girl that goes to the hair salon and tells the stylist something like: "I'm so bored with my hair. I want something different, but don't change anything. You know what I mean?" I don't colour my hair, I've layered it a few times and I've had a fringe, but I have a love-hate relationship with these things. I like my hair one-length, it's easy for me to manage. What's easier than wash-and-go hair? My last two visits to the hairdresser were funny. One stylist sat on the floor while trimming my ends. The chair was at it's highest and she didn't want to have to bend over at an angle, only to not be able to see what she's doing properly. The other, who I've been going to on-and-off for years actually sighed and then asked what I would like to do with my "mermaid hair", if anything. As if I didn't already know I was kind of boring...boring hit me in the face and for a long time I've been wanting to step up my hair game. Mainly, just learn to style it differently.

So, I learned a few simple and quick things to do without pushing myself too far out of my comfort zone. I like the elaborate 'dos, but many of them require styling products, and the less I use, the better, to be frank. Note: I don't have a great track record with hairspray. I hate those strong hold sprays that make your hair so dull and crispy that when you take down your up-style, it feels like you've put your hand into a bag of Lays Lightly Salted and just crunched up/squashed the chips in your hand like you're mad at it. It also, somehow, always ends up in my throat via inhalation or phantom ingestion.

Last month, rubybox challenged me with this, by requesting me to do a quick and easy up'do as a RUBYROYAL. And so I huffed and puffed and blew my hair out...nicely, for a change.


Products I used in the video, as well as my current hair routine:

Kerastase Cristalliste Shampoo will set you forward about *R255 (250 ml) and *R275 (200 ml) for the conditioner.

Kerastase Cristalliste Shampoo and Conditioner for long, thick hair. I don't have "thick hair" but it still worked nicely and wasn't heavy at all. I felt the difference in my hair the second I started rinsing out the shampoo. My wet hair felt smoother already. I was using the Kerastase Dermo-Calm before this one, which is also great for more sensitive scalps. My scalp gets funny every season change with my allergies and all, so this gentle scalp cleanser is a regular for me, and I alternate when needs be.

Kerastase Mousse Bouffante, 150 ml retails at about *R260

Kerastase Mousse Bouffante (strong hold): my new obsession. It's part of the Prado Blue / Customized Construction / Designer range, within their new Couture Styling range, which is designed to be used on towel-dried hair. I only applied it in a horseshoe shape around my crown for the video. It works best if you apply it to damp hair, just before you blow-dry that area. Don't apply it all over your head and then leave it while you dry your hair section by section, it will become a little sticky and harder to work with and blow out. If you like lots of volume (read: high hair) then blow-dry the relevant sections of hair up and forward (or in the opposite direction you want it to fall), and when you're done with that piece, just gooi it back. This product (and others in the range) also provides heat protection, thanks to a Xylose agent, so you don't have to worry about applying yet another product before heat styling. It also provides UVA/UVB protection which is still way too underrated, in my opinion. (And thank goodness, because I've been using a sun protection hair CREAM, which is not ideal for fresh-hair-longevity and volume.) We always see sunscreen and UV protection products for face and body, and not enough for scalp and hair, leaving it unprotected and vulnerable to sunburn and UV damage. Two thumbs up from me, Kerastase.

All the products in the new Couture Styling range are said to provide hold, but still allow for the natural movement and flexibility of the hair, thanks to micronized polymers and their shape memory. The products also contain Vitamin E, one of my favourite vitamins/antioxidants. And may I just say that I absolutely LOVE the colours and product packaging. It's gorgeous.

Kerastase Elixir Ultime Retails at *R450

After drying, I always apply the Kerastase Elixir Ultime from mid-length to the ends, and whatever's left on my hands, I run through from the roots. You can read more about how I love and use this product HERE.

Slightly messy with bits and pieces coming out, but you can do it more "tightly" and neater. I was going for "effortless".

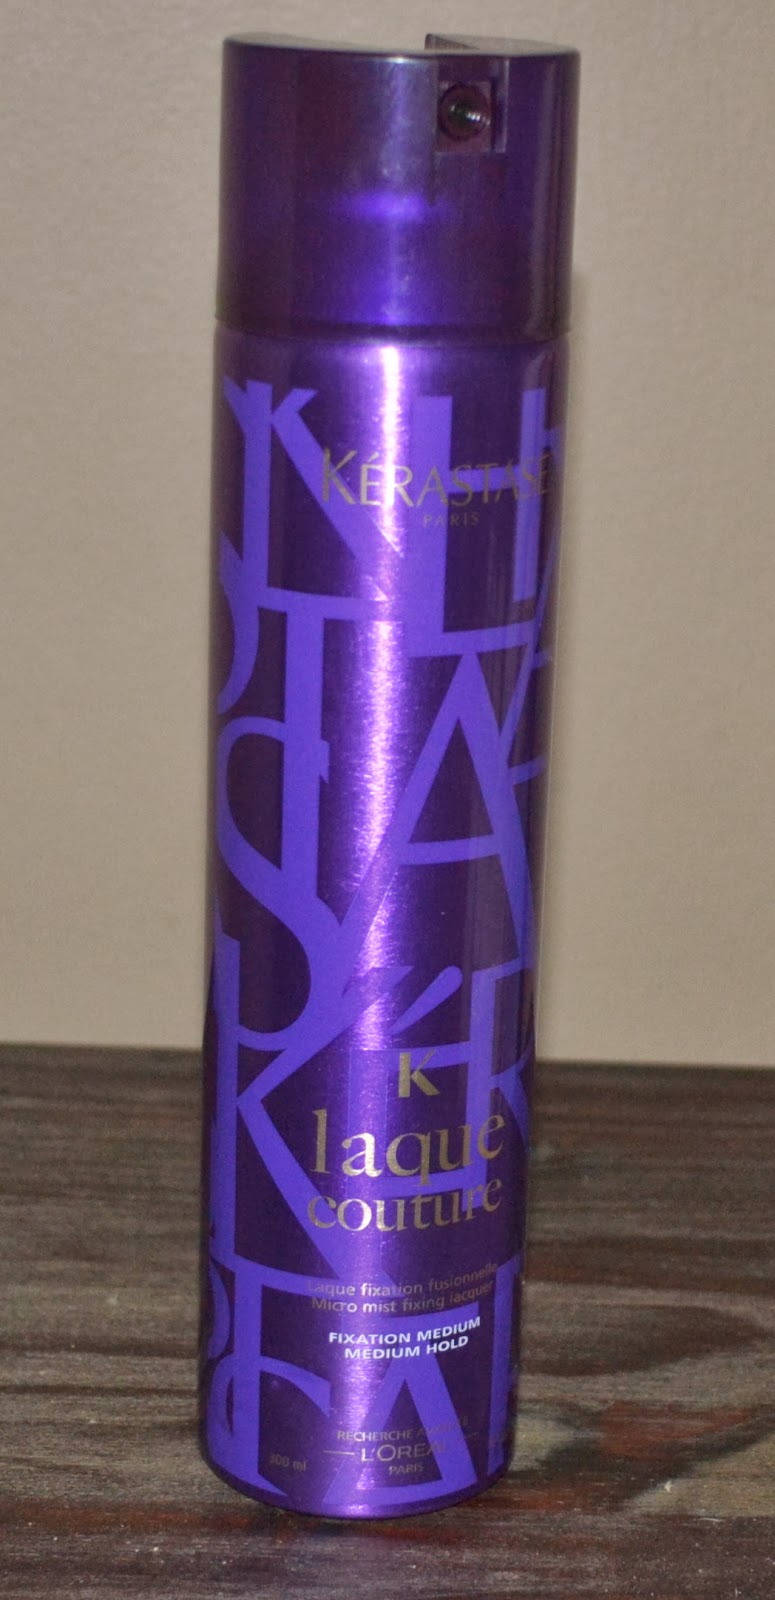
I then made the low-knot bun with a twist, and set with Kerastase Laque Couture Micro Mist Fixing Lacquer (medium hold):

Kerastase Laque Couture 300ml retails at about *R260

This hairspray is UH!-mazing. It falls under the Violet Vision / Perfect Finish / Perfector range - to be used on dried and styled hair - also as part of the Couture Styling range. Firstly, I didn't choke after spraying, and there was no phantom ingestion. It has a very light scent, and there was no hair hardness, whatsoever. YESSSSSS! You spray it onto your dry, styled hair from about 20-30cm away, and off you go, owning the day/night/life/universe. In the video above, I had probably done the low-knot bun thrice and sprayed it every single time before shooting the intro, and you can see that my hair still has lots of movement. A few kinks and bumps from knotting and twisting and bunning, but no Stepford-Wife-hair action. The really nice thing about these products is that unless you're really paranoid/obedient/self-conscious about washing your hair and product build-up, this won't weigh it down and need to be washed out immediately, when you've returned from owning the day/night/life/universe. If you wash your hair every 3 days, using this won't make you need to wash your hair after 1 or 2 days. So, it's great for everyday use, if you like rocking cool hairstyles errrday. It's perfect for loose curls/waves, too. Hello, summer, beachy hair. Although, there are other products specifically for that function. The Laque Couture provides the same protection as mentioned above for the Mousse Bouffante, and has the same benefits.

You can check out other products from the Kerastase Couture Styling Range in CONSTRUCT and FINISH. Sigh, I want everything. I've got my eye firmly fixed (ha!) on the Forme Fatale Bodifying All-Over Gel (Construct) and the Gloss Appeal Instant Shine and Top Coat Spray (Finish), though. The Kerastase Initialiste Advanced Scalp and Hair Concentrate, a skincare inspired super serum, has been on my wish list for a few months now, too.

With these side-kicks, I think I should get over my crispy Lays hair fears and will try a few more elaborate up'dos. What are your favourite up'dos and which do you think I should try?


Miss B
* Prices at time of purchase/publishing. Prices are subject to change and may differ depending on retailer.
Kerastase Cristalliste Shampoo and Conditioner, Mousse Bouffante and Laque Couture were sent to me by rubybox for the purpose of demonstrating an updo for their video channel. I did this review because I have been using Kerastase for more than a year now, at my own expense, and am thoroughly impressed with their products. All of the above are now staples in my routine. This is not a requested or sponsored post. See more about my reviews HERE.

Tuesday, 20 August 2013

Smashbox Photo Finish Bronzing Foundation Primer

I bought this on Rubybox as a gift to myself. They had a Christmas in July Sale. AAAAAAAHHHHHH.
Smashbox Photo Finish Bronzing Foundation Primer Review
I've always wanted to try the Smashbox primers as they walk away with most of the beauty awards in their category. I've tried a few of their primers before, in the store, on the back of my hand, just to feel the texture and see the finish. And I could never close the deal because I've justified to myself that hand cream and socks and underwear were more important at the time. As if my face doesn't need underwear, too.
So why now? Because I'm a big girl that doesn't like powder (or even wear proper foundation), so I need a different approach in longer-lasting makeup. According to it's description, it's meant to warm the skin tone, reduce visible pores and fine lines, and even skin tone, making for a smooth application of foundation.
Well, it arrived and I went NUTS! Jumped up and down, did a little booty dance, NUTS!

Smashbox Photo Finish Bronzing Foundation Primer Review
Until I put it on my face.
Smashbox Photo Finish Bronzing Foundation Primer Review
Eh. Hmm. Urgh. Meh.
It was like this one time when I was a kid and there were grapes on the table and I was all "YAY! I love grapes" and took a handful, then I bit into one and it was an olive. Or at my matric farewell, when I was so happy there was potato salad and dished a whole BIG spoonful, and saved it for last, and it was a feta salad thing. Who does that?! Seriously.

Smashbox Photo Finish Bronzing Foundation Primer Review

It has a nice smooth texture and feels velvety. It's also pretty mattifying and has a nice, light scent. I love the black and clear bottle. And that is all that is good for me, friends. Although it comes out a dark, bronze colour, it "melts into" your skin. I wouldn't call this product "bronzing" because it didn't "warm" my skin tone. Also, in case you thought it was luminizing or even slightly shimmery, it isn't. It's very matte. It didn't even appear tinted. I specifically applied it to only half of my face, first, to see the difference. There was no difference. It neither softened fine lines nor reduced the appearance of pores. Nada. If anything, this is a mattifying primer. It feels nothing like any of the Smashbox primers I've tried in the store before.

Have you tried any of the Smashbox primers? Which are your favourites?


Miss B

Tuesday, 2 July 2013

Rubybox Tools: Eyeshadow Brush

Can one ever have too many eyeshadow brushes?

Well, I guess you can, but I never get tired of it. I'm not sure how many I have, but I'm going to guess about 20+. And I really feel it when I decide to wash all of them in one session. *head in hands* And yes, I use almost all of them. As a makeup artist, they all have a place, but in a personal capacity, I think I'm just weird with my eyeshadow brushes. I tend to designate them to certain products. For example, I won some Dr Hauschka products on One Stiletto At A Time a while ago (which I LOVE) that included eyeshadow brushes, and I only use those eyeshadow brushes for the eyeshadow compact that came with it. Also, I have this angled eyeshadow brush that I only seem to use to apply/blend a specific grey eyeshadow. Whaddup widdat?
rubybox.co.za


Rubybox Tools Eyeshadow Brush is flat with a rounded, tapered edge. It has silky nylon fibres, and is not very dense. It seems a bit "thin". It doesn't seem to affect the quality of application, though. It also depends on what you like, I suppose. When I looked at it and felt the bristles, my first thoughts were that it'll be best for cream/liquid shadows or for when you want to apply eyeshadow powders with a damp brush for intensity. The texture looks like that of one my professional concealer brushes.

Well, I've tried it a few ways and it works well. For dry, compacted shadows (most common form eyeshadow packaging, think standard MAC eyeshadow singles and eyeshadow palettes, generally. They're compacted.), it picks up just enough so that you don't have to tap off any "excess". By "just enough" I mean I press the brush onto the compacted shadow once and it's enough to see the colour/product on your lids in a single application, but there is room for layering. Everyone's intensity preference is different, but I prefer to have the option to layer. I don't do that whole swirling and swiping motion with the eyeshadow brush in compacted eyeshadows: it's untidy and it wastes product as you end up dusting the excess "loose" powder off or blowing it...which is super unhygienic, btw. Don't be gross. Eeuw.

Obviously, for loose eyeshadows (such as Black Up's Glitter and Pearl Powders. Also called "pigment pots" or something similar at some other brands) it depends on your dispensing method. If you're going to "dip" the brush into the pot until you feel the bottom of the container like you're mixing batter, tapping will be necessary, but Rubybox Tools Eyeshadow Brush provides for a smooth application if you just "touch" the little that you're going to use, or if you're like me and prefer the subtle, take the bit on the sides of the pot. Same goes for using it dampened: decant eyeshadow and press onto lids for colour depth and intensity. Do not drag on your eyelid.

My favourite way to use this eyeshadow brush, as I initially thought, is for cream shadows. It's got the perfect shape and texture for this purpose. I've used it for creams shadows about thrice so far and it provides smooth application and blends really well. So if you get it for any reason, get it for your cream shadows. Or for all the liquid/gel eye cosmetics now available. It works much better than those sponge-tip applicators and is much easier to clean. Not keen on cream shadows? That's fine. Luckily, this brush has a "multi-medium" appeal and you can use it with your current eye-shadow products.

Rubybox Tools Eyeshadow Brush is R99.95 on rubybox.co.za


Remember to vote for me in the Rubybox Ruby Royal Competition here or here.
Thank you.
xxx


Miss B

Friday, 28 June 2013

Rubybox Tools: Foundation Brush

If you didn't know, I really love Rubybox. So, it makes me happy that they have their own brand of beauty products in the form of Rubybox Tools. Tools make me happy. I can hardly imagine what our made up faces would look like without tools. Well, I can, but it's not as pretty as with tools.

Out of the few that I have, we should probably start at the beginning (of our routines) with their Foundation Brush.


It's a flat, medium-sized foundation brush, with tapered bristles that are soft yet firm. Because I'm such a hygiene-enthusiast I clean foundation brushes after every use (unless I'm rushing in which case I do a quick clean on a makeup removing wipe and wash it later), and it's kept it's shape after 6 months of use. I also don't recall seeing one of these bristles on my face or décolleté after makeup application: a problem I've had before with other professional brushes. I've never loved a flat foundation brush as much as I have this one, and I love that it's tapered. I've used flat-edged ones before that don't blend very well. Different strokes for different folks.

In terms of application method, it's great for product economy as you use less product than you would if you just smeared it on your face with your hands. It works well to apply your daily moisturizer if you like all that faffing on your face. The blending ability is good...for most foundation products. I don't necessarily think that the fault is in the brush, but rather with the texture/medium of certain products. I love applying my tinted moisturizer with this brush and it works perfectly for that, but as mentioned in one of my BB Cream reviews, I looked like I was coated with butter, ready to go into the oven, when I used it with that specific product and needed to blend with my fingers afterwards.

This brush is so gentle that although it probably works best in linear strokes, you could use it in circular motions if you so wished without "pulling" on the skin. The size is also perfect to apply product to the eye area. You can apply your foundation or the like under your eye and get right up to the lower lash line and blend it without getting product on your lashes or in your eye. Same goes for the upper lid. I can easily control the brush to get product right up to my eyebrow without letting it touch my brows.

I also use this brush to apply cream blush. Say whaaat?! Yes, that's right. I have really cold hands and this makes it hard to apply cream blush evenly, most of the time. The product doesn't melt into my skin nicely and look very natural when my hands are super cold and it feels like I'm trying to colour in my cheeks with new pastels, all while PULLING my skin. I hate skin pulling so much. Also, the product seems to be "softer" in it's compact than on my icy fingers. And when I don't have all the time in the world and sometimes have to apply my makeup in the car after touching the keys to unlock the front door, the security gate, then lock the front door and security gate, open the front gate that needs some extra loving via a push, close the front gate that now needs to be pulled, open the car door, close the car door and then put on my seatbelt...my hands are no longer hygienic and sanitary enough for me to be touching my face. So why not use a brush instead? Saves me a whole lot of potential problems and anxiety. I have a reactive skin, okay, stop judging. I do NOT have OCD. And the results are great.

If you've been thinking of getting a foundation brush but haven't yet decided on one, this one is definitely worth a try. Plus, that matt black handle looks so smart and classy.

Rubybox Tools Foundation Brush retails at R149.95 at rubybox.co.za.


Rubybox is currently running a competition, in search of a brand ambassador, called RubyRoyal. I've entered and would appreciate your vote. Go team! *shakes pom poms*

To hit me up with votes click http://bit.ly/10Qdu4S and "vote" if you're on a PC or Laptop. Unfortunately, that link doesn't work from mobile devices. I have no idea why, I'm technically tehnologically challenged. If you're on a mobile device click HERE, then "View entries" and click on my video "Elana, Cape Town" and vote. All your support would be greatly appreciated. Thank you. :-)


Miss B


Wednesday, 29 May 2013

Garnier Miracle Skin Perfector BB Cream

amazon.co.uk

I tried this for the first time last year, but couldn't judge it fairly as there were many variables at the time. I've revisited it, and am kind of impressed.

I'm not Garnier's biggest fan, generally, as I've had a bad experience or two using their skin care range(s), so I was a bit hesitant, but it was one of the first BB creams available in SA, and cost-effective (about R89) at that, so my curiosity got the better of me.

It's a 5-in-one and is meant to even tone, hydrate, smooth fine lines, blur imperfections and provide an SPF of 15. I used the "medium" shade, and although it looked a bit muddy (with hints of pink) on me at first, it blended really well. Depending on your skin type, you can use this on clean skin sans a moisturizer. It makes for really smooth application with your fingertips as you would apply your moisturizer. If you have normal/combination skin, you probably won't need to moisturize at all, just apply your eye product if you use one, and then Garnier's Miracle Skin Perfector BB. I can't really advise application methods for drier skins, as I find this BB quite oily for myself, and won't be able to tell if it's enough for you, or if you need added moisture. After about 2 hours, I'm whipping out the blotting sheets, and I always need more than one. Bear in mind that I don't use powder.

It provides a light coverage, with a radiant finish. My skin looks dewy after I apply it. This doesn't settle, and become matte. In fact, as I mentioned above, it becomes quite shiny and oily looking. Not just on the "oily T-zone" but everywhere. I actually look super gross after about 2 hours. Like, seborrheic. Or like I just cracked open an oil capsule and lightly brushed it on my face, with a basting brush. I tried using powder once with this BB cream and it certainly does make a difference, but not for long. I needed to use blotting sheets anyway, just not as soon as without the powder. 

I probably won't use this all over my face as a BB cream again, but I have to note that while using this, my skin did improve. Yes, the condition of my skin became better: clearer and more even. I don't have uneven skin tone, as such, but the difference was noticeable. Also, I "breakout" regularly (thanks, PMS) which doesn't always look bad, sometimes it's not at all noticeable. It is, however, a nice test for me with regards to products.  I like to try it out during that time so that I can observe how my skin reacts. Because of the light coverage, it doesn't cover spots really well. Not on it's own anyway, but it makes for a nice primer/spot-treatment under foundation.

For me, the best way to use this, is as a highlighter. I've tried it both under my foundation and over, and it works, both ways. It's got some concentrated mineral pigments which makes for a very nice glow that doesn't make you look like a disco ball. More like a Chrismas ball/bauble. You know, a little more subtle. I apply it to my cheekbones and brow bones, and on really lazy days, I use it over the entire eye lid with a coat of mascara. If you use a matte or mattifying foundation and have those days where you want t little more radiance without the effort of bronzing powders, highlighters and and and,  I think it would work really well if you add a tiny little blob of this to your foundation.

When I bought it, there weren't testers available, but I've noticed that there are now. So make sure to test it ON YOUR FACE before buying it, to make sure you get the right shade, unless you're getting it for highlighting/priming purposes.


Miss B

Wednesday, 17 April 2013

Bobbi Brown BB Cream SPF 35

everythingbobbi.com
I'm still on a mission to find the perfect BB Cream for myself. I've never really owned (a full coverage) foundation. The first and last time I had foundation on my face was for my matric dance when I had my makeup done. I don't like it. Or I don't like the idea of the "masking" effect, rather. Yes, I know we've come a long way and there are super stuff on the market that "melts" into your face and becomes a "second skin". Maybe I'm just hesitant because I have a post-acne reactive skin. Either way, I prefer tinted moisturizers, and now BB creams. Plus, I'm a sucker for multi-purpose products.

Bobbi Brown BB Cream SPF 35 is said to cover imperfections and, therefore, even skin tone; moisturize and control oil; brighten skin instantly and over time; help reduce the appearance of wrinkles and help protect against UVA/UVB radiation.

I haven't worn this on it's own (without sunscreen underneath) during the day so I can't really comment on the protection element, but it definitely provides some cover, moisturizes and brightens. I'm not entirely convinced on the oil control factor, as my forehead can get oily over time, and I've noticed this while wearing this BB cream. However, I don't think it's anything a little powder can't fix, and I'm hardly ever without blotting sheets. I'm not big on powder.

It comes in 5 shades: Extra Light, Light, Fair, Medium, and Medium to Dark. At first glance, I assumed I'd be the Fair, but after testing it (and the Medium) on my skin, with much appreciated help from one of the assistants at Bobbi Brown, I'm the "Medium to Dark" shade. There wasn't anything darker, but it works for me.

I swatched it next to a little blemish, see?


Made sure I spread it over the blemish.

Completely blended. A bit pink on my hand, I know. But, blemish covered.
It has a light-to-medium texture, with no obvious scent, and would probably be best applied with warm fingers. I often use a foundation brush to apply this, but I find I look a bit like a pastry that has just been brushed with melted butter or egg yolk: a bit wet and slightly yellow. So, I always end up using my fingers to blend it into my hairline and all along the "perimeter" of my face, right down to my jawline. I also do this above my brows and on the sides of my nose. It just looks better once I've gone over it gently with my fingers and once I do it, it really looks like it just "melts" into my skin.

On first application, before blending completely, it looks like it has yellow undertones (hence the butter/egg yolk brushing), which is great, because I have yellow undertones, so matchy-matchy, right?. But on my hand it looks pinkish. The pink is not obvious on my face, though, and I suppose it contributes to brightening up my face. Also, the yellow undertones help cover any under-eye blueness, and some slightly green veins showing through the delicate skin around the eyes. Mine are quite obvious, and I didn't need to use concealer with this Bobbi Brown BB cream. I just dabbed a little more (a second layer, as such) BB cream over the visible veins, and they were gone. Gone gone. Looked completely covered, but still natural, like I never had it to begin with.

It provides a smooth, medium coverage. My face looks matte but not dry, and usually by the time I've applied the rest of my makeup, it looks more natural and glowy, but not shiny. If you want a more matte look, you could apply powder, but as mentioned above, I don't love powder. I know it sets your makeup, etc, but I'm a minimalist, and I don't like looking too matte. I like the radiant, glowy, I-just-moisturized look.

Overall, I like it, and it looks natural on photos, with minimal flashback, despite the high SPF. Unfortunately, I can't use this everyday. I've been using it for almost 4 months and noticed that I start breaking out when I use this on consecutive days for longer than 2-3 days. It may be a little too rich for my combination skin, so I save it for "special occasions." Having said that, I think this would be great for someone with a normal-to-dry skin.

Have you tried this one? How does it work for you? What are your favourite BB Creams?


Miss B


Monday, 25 February 2013

Essence Goodies

Got a few Essence goodies in the November Rubybox, so I've had quite a while to try it...

Essence Colour and Go nail polish in Nude It
image from nihrida.com
Nice colour, crap brush.
I never really LOVED the nude nail trend. I think it suits many people, but I don't love the earthy tones on myself. Essence's Nude It was pretty, though. And after the first coat I thought, "Hey, this could work." It doesn't have that orange or yellow tone that some nudes tend to have, and it also doesn't have the pink undertone. It's a proper, earthy, light-brown type nude. And that's all that was good about it. And the fact that it dries quickly.
I got frustrated painting my nails with this one. I did it over thrice thinking I was the problem, but turns out I wasn't. It didn't come out even at all. Not once. At first it was streaky, and I was expecting a bit of self-levelling, but it just dried that way, and looked terrible, hence not my own picture above. When I tried it the second time with less pressure (thinking maybe I put too much pressure on the brush) it still did that and when I tried to correct it, it just ridged and bubbled. Annoying. I don't think that the formulation was the problem, but rather the brush. It seemed uneven and very hard. I've got one other Essence nail polish, and it's not as bad as the Nude It one, so maybe it was just that one I got. Still, nothing about it made me want to go out and get it. Not even the fact that it didn't look weird with my complexion.

Essence XXXL Nudes Lipgloss in Pure Beauty
image from ebay.co.uk
I love this. It is surprisingly moisturizing. Whenever my lips are looking a bit dry, I apply this first before my lipstick, just to smooth it out a little. Of course, it is better to continually moisturize your lips and never let it get to that point of dryness, but sometimes one can't help it. Code for 'I have more important things to do than apply lip balm every 10 minutes.' Either way, this is nice. It doesn't dry your lips with continual use. I used it every day for a week with no other moisturizing lip balms and I had no issues. It doesn't affect other lip colours too much, but I would recommend applying this before your lipstick, unless you want your lipstick to look a shade or two lighter or if your lipstick is the same colour or a very similar nude. It blends very well, and isn't sticky. If you press your lips together, they're not going to stick together or feel uncomfortable when you separate them. It's also not disco ball shimmery.  It's has a very subtle shimmer and gives more of a great translucent sheen. The scent is great. It smells like vanilla icing meets toffee and white chocolate, and tastes like that, too. I know, but it happens. I'd like to try the Glamour to Go, Bubble Babe and Nude Kiss. Maybe even Nude Candy, although it seems a bit light for me.


Essence Metallic eye pencil in White Divine
Top: Essence Kajal Pencil no.19 All I Want. Read more about it here
Bottom: Essence Metallic Eye Liner in White Divine.
I absolutely LOVE this eye pencil. It is very soft, so no need to add pressure and drag on the skin of the very delicate eyelid. There's also lots of room to play with the intensity. That is one "coat" in the picture and I used the pencil at an angle, hence it looks like quite a broad line. I love using this on my upper eyelids and then smudging it, so it looks like there's a bit of shimmer, but it's not as intense and obvious as above. It looks great smudged, with nothing else but black liquid/gel liner. This is also great to lightly line your lower waterline. I don't like lining the waterline with white at all, but if you use this baby very lightly it may make your eyes look bigger and brighter without the chalk-looking effect. Another way you could use this is to line your upper lid finely. Make sure to sharpen the pencil, k? Also, if you often get highlighting powder in your eye when you try to dab a bit onto the inner corners of your eyes (especially if you're using a brush), or just want something really bright, try this. I actually prefer it to powder. And if you apply too much, just smudge it. And lastly (I think), make your pout pop by lightly lining your cupids bow with this li'l wonder. And gently smudge it. :-)

What are your favourite Essence goodies? Tried any of the above? Tell me below in the comments section.


Miss B


Saturday, 23 February 2013

BB Creams

For those who are still in search of great, affordable BB creams, Revlon and Rimmel's versions are now available in SA.
Revlon Photo Ready BB Cream Skin Perfector

Rimmel BB Cream 9-in-1 Skin Perfecting Super Makeup


You can read Leigh's review at Lipgloss Is My Life. Love her!!!

What BB creams do you use and love?

I can't wait for L'oreal and Maybelline's BB Creams to get here.

Miss B


Wednesday, 28 November 2012

Kérastase Elixir Ultime

Retails for about R405.
Pic from kerastase.co.uk

I have a bad case of the flyaways. It's like my baby hairs along my hair line just won't grow up. Updos have become a no-go, because I hate the after-effects of firm hold hairspray and gel. My hair feels and sounds crispy when I try to loosen it. Too sexy. It's like I'm putting my hand into a bag of chips and just crushing it! Lays, specifically.

I was "introduced" to this product by a friend who couldn't help raving about it, because she loved it so much. I was a bit hesitant to buy this product at first, especially since there are so many other hair silicone and oil products on the market at much more affordable prices. I went for a hair consultation, and the stylist used this product after the blowout and I almost didn't recognize myself without flyaways. That, and I clearly applied my blush like I was mad at my face..in the dark. I was so excited, I even tied up my hair into a high pony...after a PROFESSIONAL blowout. It was THAT amazing. Why would you want to tie up your hair after a professional blowout, right?! I have never...before that day.

It's multi-tasking abilities also grabbed my attention. It can be used on damp hair before styling (for shine, as an anti-frizz and as a leave-in conditioner. It's NOT a heat protector) and after styling, to smooth strands and flyways. It can also be used before shampooing as a pre-cleanse. My stylist explained that if you use a lot of styling products, you can apply a pump or 2 of Elixir Ultime through your hair a few minutes before shampooing to loosen product build up, as well as nourish the length thereof. Doubt I'll ever use it that way, as I'm a lazy-hair kinda girl, but it's good to know. It's also very light, doesn't weigh my fine hair down, and it doesn't even leave that horrible oily residue on my hands after I apply it. You can also apply a little everyday if you so wish. I tried this for 3 days, and it didn't make my hair oilier faster than usual. My hair was still okay after 3 days. It looked exactly like my 2-day-old hair. 

You can read more about the application of Kérastase Elixir Ultime here. They even have short videos for every possible way you could use this product.

Kérastase Elixir Ultime contains a complex of four oils (among other things):

  • Pracaxi oil for conditioning
  • Argan oil for nourishing
  • Maize oil for moisturizing and antioxidant properties. Maize oil also has Omega fatty acids which is essential for optimal cell functioning.
  • Camellia oil for it's rejuvenating properties, as well as lovely fragrance.


Although this product is all-around wonderful, it's not as effective for flyaways if you're not doing any kind of heat styling, as I later discovered. It definitely makes a difference, don't get me wrong, but if I don't blow-dry or flat-iron my "front hairs" in conjunction with using Elixir Ultime, those little nasties will still be visible, albeit not as bad as if I used nothing. So... Still in search for a great product that I can use on my non-heat-styled hair for flyaways. I want to wash and go, and maybe gooi it in a bun or high pony, without looking like I have horns. It can be that bad, yes.

What products do you rate for flyaways? Preferably, something that won't make my hair feel hard' n'crispy.


Miss B

Monday, 3 September 2012

Esse Gel Cleanser

Image from organicchoice.co.za

Esse is a certified organic skin care brand, that utilizes Africa's plant diversity.

I used the Esse Gel Cleanser for a week and my skin was glowing after the first use. It is very gentle, doesn't irritate the skin, and has a very refreshing scent. I have a normal/combination skin, but during the the week that I used this cleanser, I was also suffering from a bit of a PMS breakout on my forehead. It usually takes 4-7 days for this to clear, but in this case, it cleared within 2-3 days. I'm giving all the credit to Esse Gel Cleanser as it's the only thing that was different in my routine.

My skin was also a bit dehydrated before I started using the cleanser, so although my skin looked great, it felt slightly "tight" immediately after cleansing. It wasn't extremely uncomfortable, but I could feel it, especially when I smiled, but after toning and moisturizing, everything was fine. This didn't stop me from using the cleanser though, and it didn't worsen the dehydration during that week, but I prefer using cleansing milks&lotions as I haven't come across a gel cleanser that doesn't make my skin feel at least slightly tight after cleansing. Although this specific cleanser is for "all skin types", I wouldn't advise it for dehydrated and/or dry skin types, unless you prefer gel cleansers to creamy ones, of course. What is your problem with cream cleansers?! They do the same thing...they cleanse your skin. FYI.

It's also a great unisex product, so if you're a man or live with one that happens to cleanse (as you/he should) it is great to share and may save on space/costs. Also, men tend to love that fresh, minty scent that doesn't smell like "girl", and they generally prefer gel/foaming cleansers. It also makes for a great body wash, especially if you're prone to breakouts/acne elsewhere on your body.

Esse Gel Cleanser is pH balanced (4.5) and contains Peppermint and Spearmint Oils which aid in improving micro-circulation, as well as Coconut oil which is known for it's antimicrobial and antioxidant properties.


Miss B